
This copycat Cheesecake Factory red velvet cake cheesecake has two layers of red velvet cake, with a layer of cheesecake in between. The tangy cream cheese frosting is in between the layers and covers the whole cake.

Want to Save This Recipe?
Enter your email & I'll send it to your inbox. Plus, get great new recipes from me every week!
By submitting this form, you consent to receive emails from Nina Kneads to Bake.
Jump To Recipe
🎂A red velvet cake with a cheesecake layer
This red velvet cake cheesecake is the perfect cake to serve on Valentines' day, Christmas, Canada day...anytime really!
It has the perfect balance of fluffy and moist red velvet cake, sandwiching a creamy cheesecake. I want all my cakes to have a cheesecake layer now!
The most perfect, and arguably, the only frosting that goes with red velvet, is cream cheese frosting. My cream cheese frosting recipe uses only a bit of butter to keep the cream cheese flavour at the forefront. I love this frosting and use it on everything (pineapple carrot cake, pumpkin cake, I could go on....)
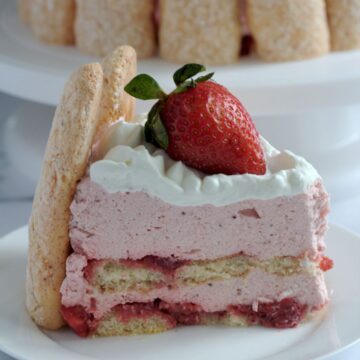
If you like red and pink desserts, try my red velvet cheesecake trifle ,red velvet cupcakes, or Valentine's day truffles!
🥘Ingredients

Ingredient notes
- Red food colouring - I use gel food colouring because a liquid food colouring adds more liquid to the cake. Also gel food colouring is more condensed, so you don't need as much. If you are using liquid food colouring, use 4 teaspoons.
- Cream cheese - make sure you use the ones that come in a brick. They are for baking.
- Buttermilk - If you don't have buttermilk, you can make your own. In a measuring cup, add 1 tablespoon of lemon juice or white vinegar. Fill the measuring cup to the 1 cup line with milk, and stir.
🔪Instructions
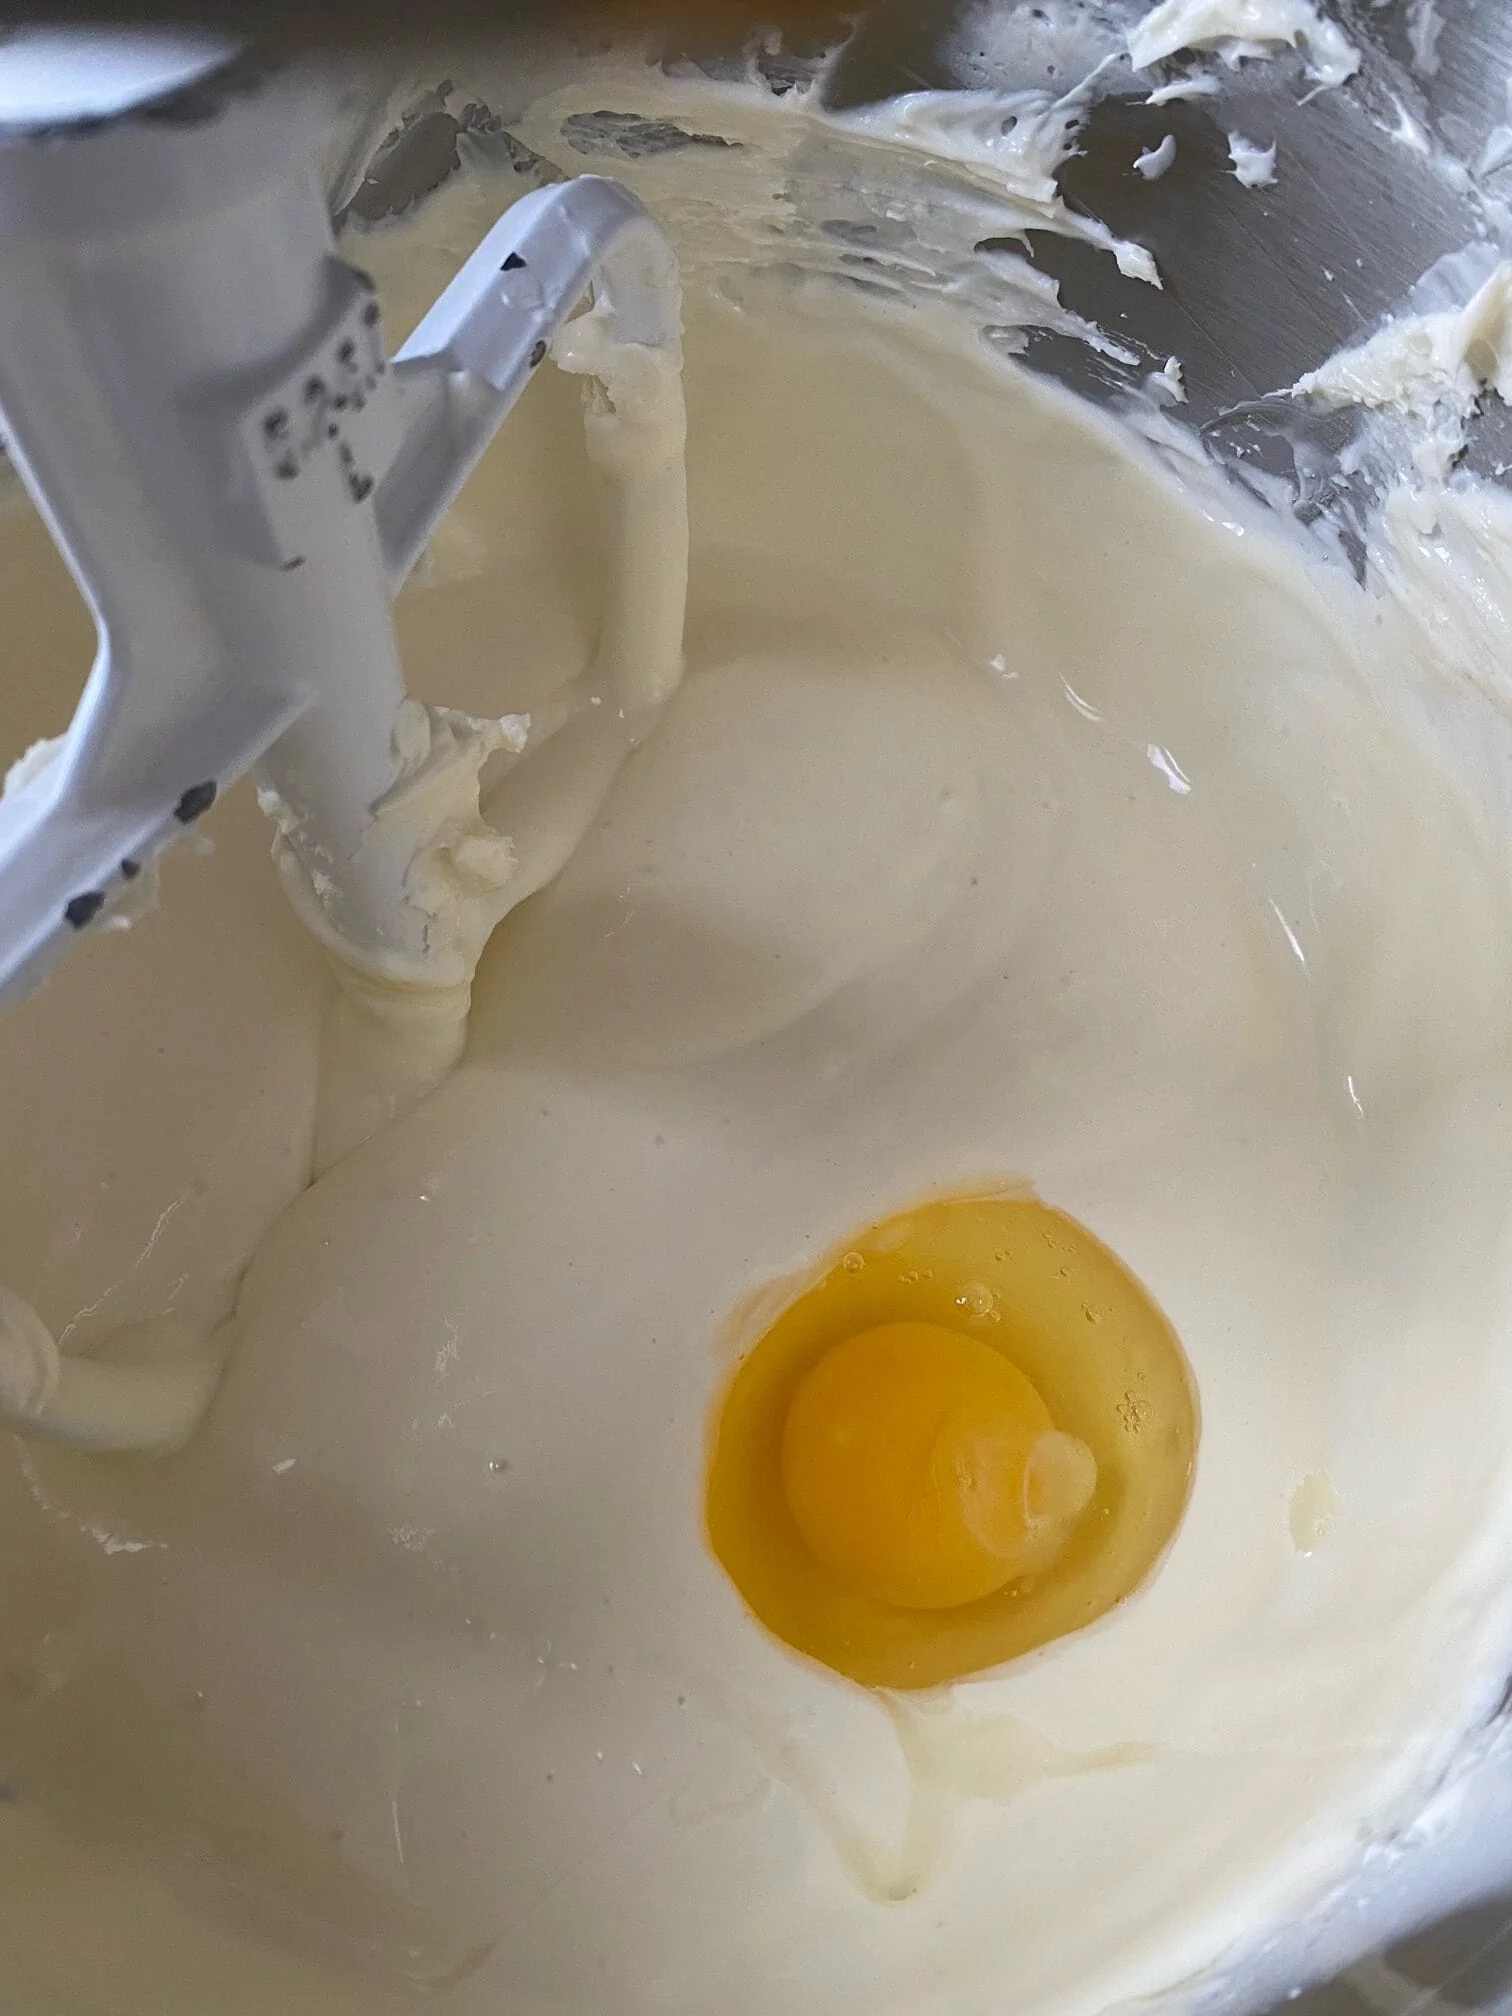
Start by making the cheesecake. Mix cream cheese, sugar and flour together until combined. Add sour cream and vanilla extract and mix to combine, scraping down the sides of the bowl when needed. Add eggs, one at a time, and mix until combined after each one.
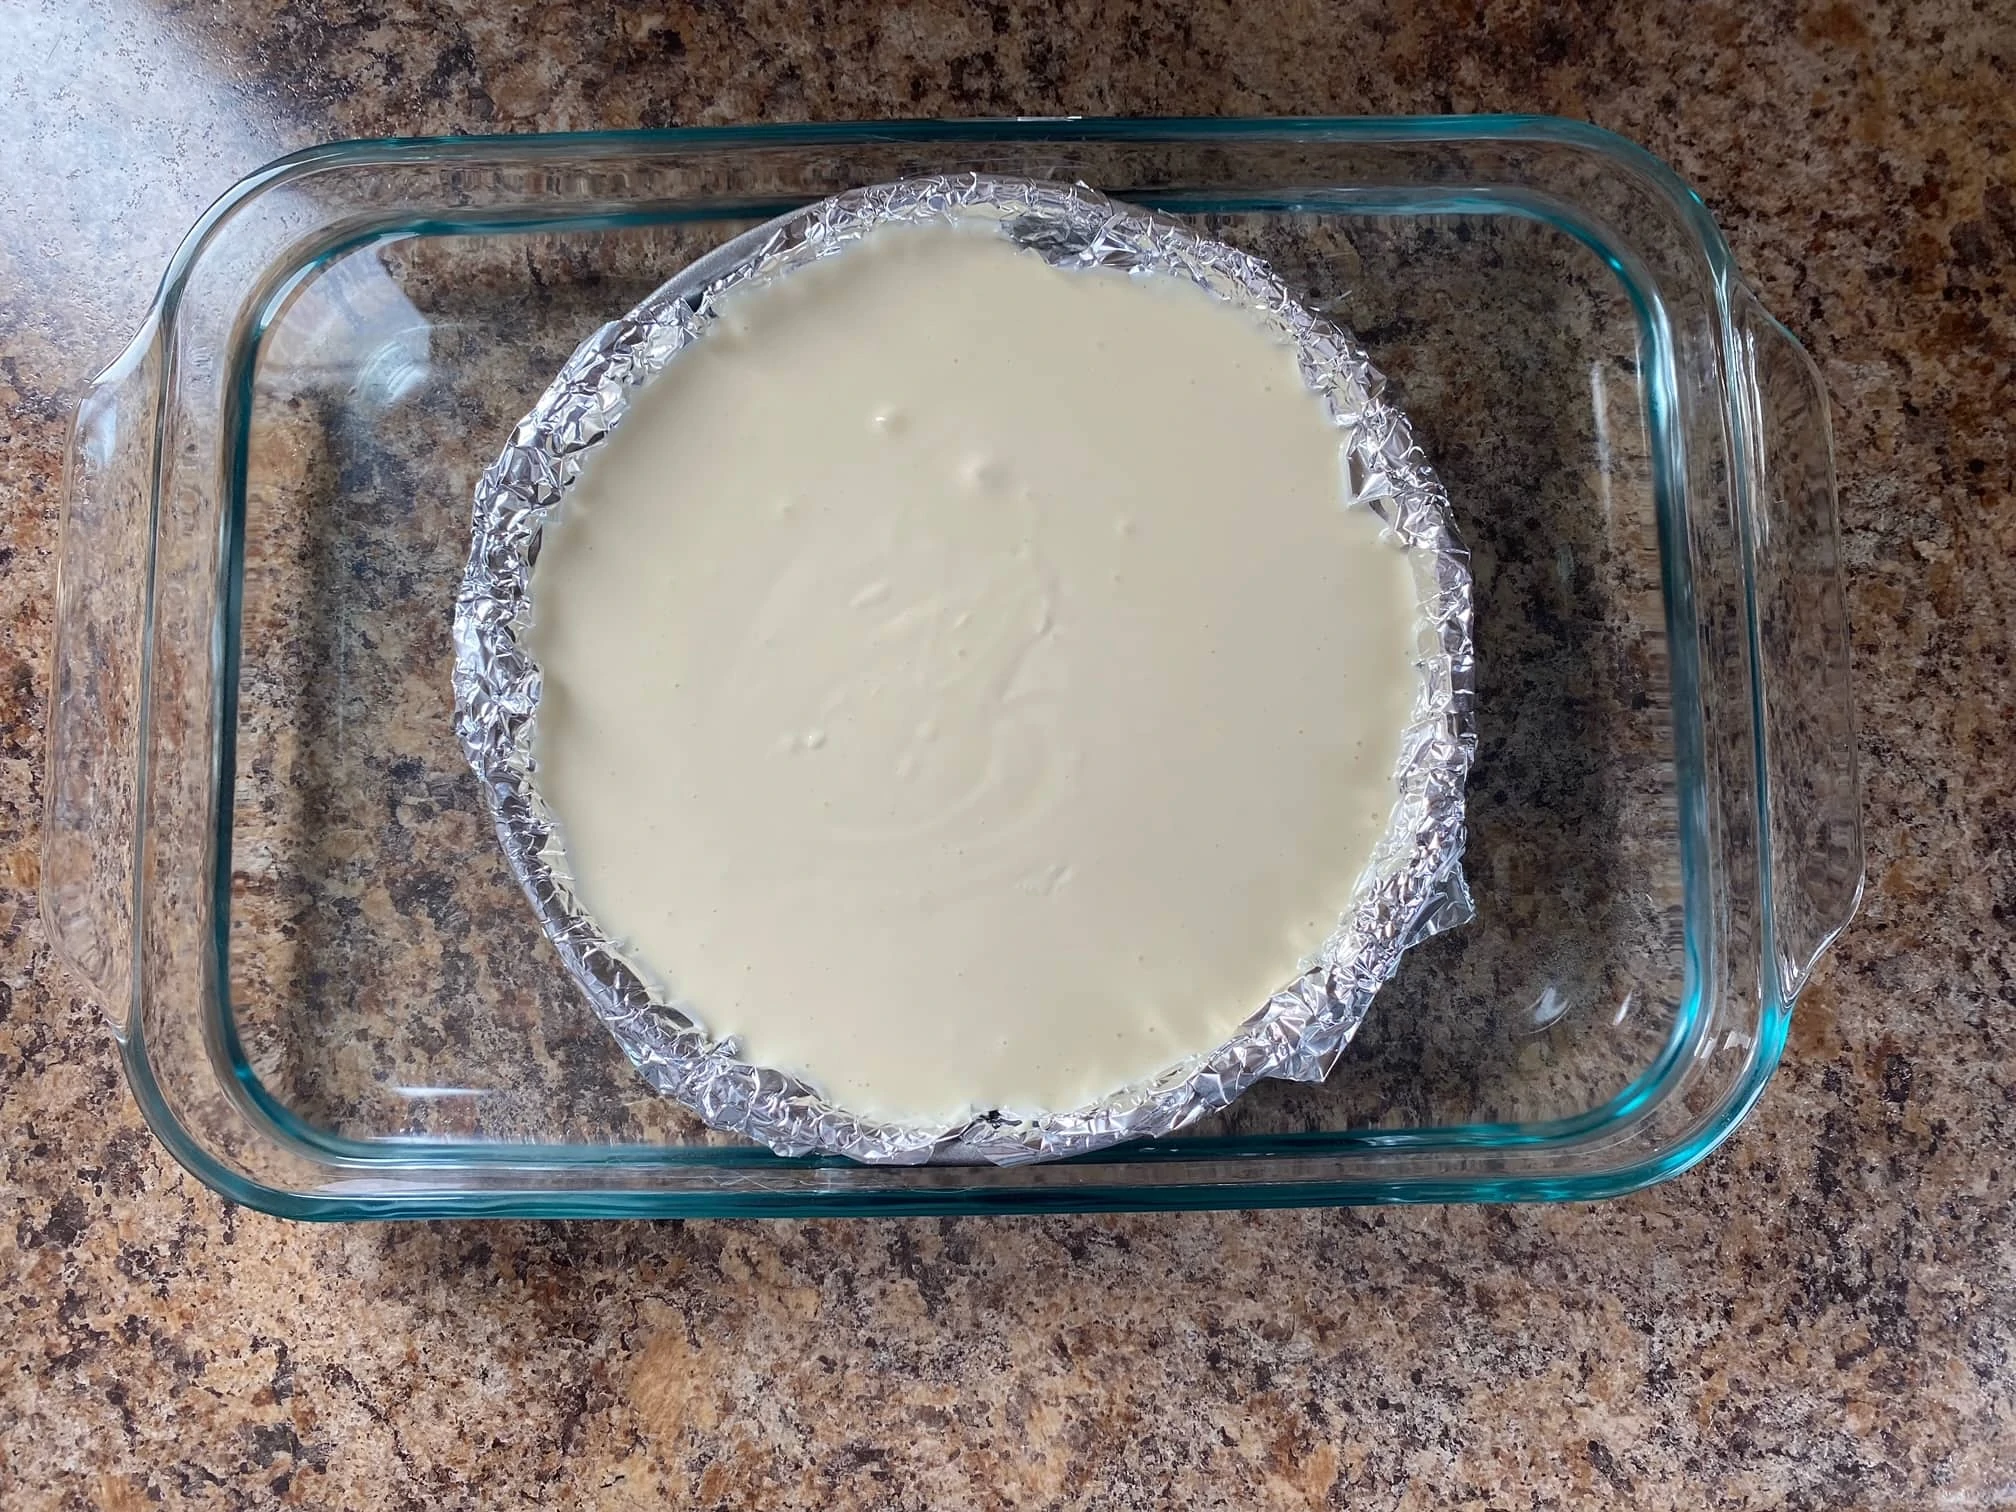
Cheesecakes are usually baked in a spring form pan, but because we want the cheesecake to be the same size as the cake layers, bake it is the same 9 inch cake pan. Not all pans are exactly the same size. Line the cake pan with aluminum foil so the cheesecake can easily be removed.
Bake the cheesecake in a water bath
Place the cheesecake in it's pan, inside a larger bowl or baking pan. Fill the outer bowl or pan with water to go halfway up the sides of the cheesecake pan. We are giving the cheesecake a water bath.
Don't skip this step. You might be itching to just get the cheesecake in the oven, but trust me. A water bath is crucial to helping cheesecake bake evenly and helps against cracking.
Bake the cheesecake low and slow - 300°F (148°C) for 1 hour. Then leave the cheesecake in the oven with the oven turned off for 30 minutes. Then crack open the oven door and leave the cheesecake in the oven for another 30 minutes. This slow cooling process prevents cracking.
Bring the cheesecake out of the oven and place it on a wire rack, keeping the cheesecake in it's baking pan. Cover the cheesecake in it's baking pan with plastic wrap and cool it in the refrigerator until firm - 6 hours or overnight.
Red velvet cake
Next make the two 9 inch red velvet cakes. In a medium bowl, combine four, sugar, baking soda, baking powder, cocoa powder and salt. Whisk to combine and then set the bowl aside.

In a large bowl, combine buttermilk, oil, vanilla, eggs, vinegar and food colouring. Mix it together, and then stir in dry ingredients until combined.
Stir in water until combined, Pour the batter evenly between two 9 inch cake pans that have been greased and lined with parchment paper. Bake at 350°F (176°C) for 22-25 minutes, or until a toothpick comes out clean.
Cream cheese frosting
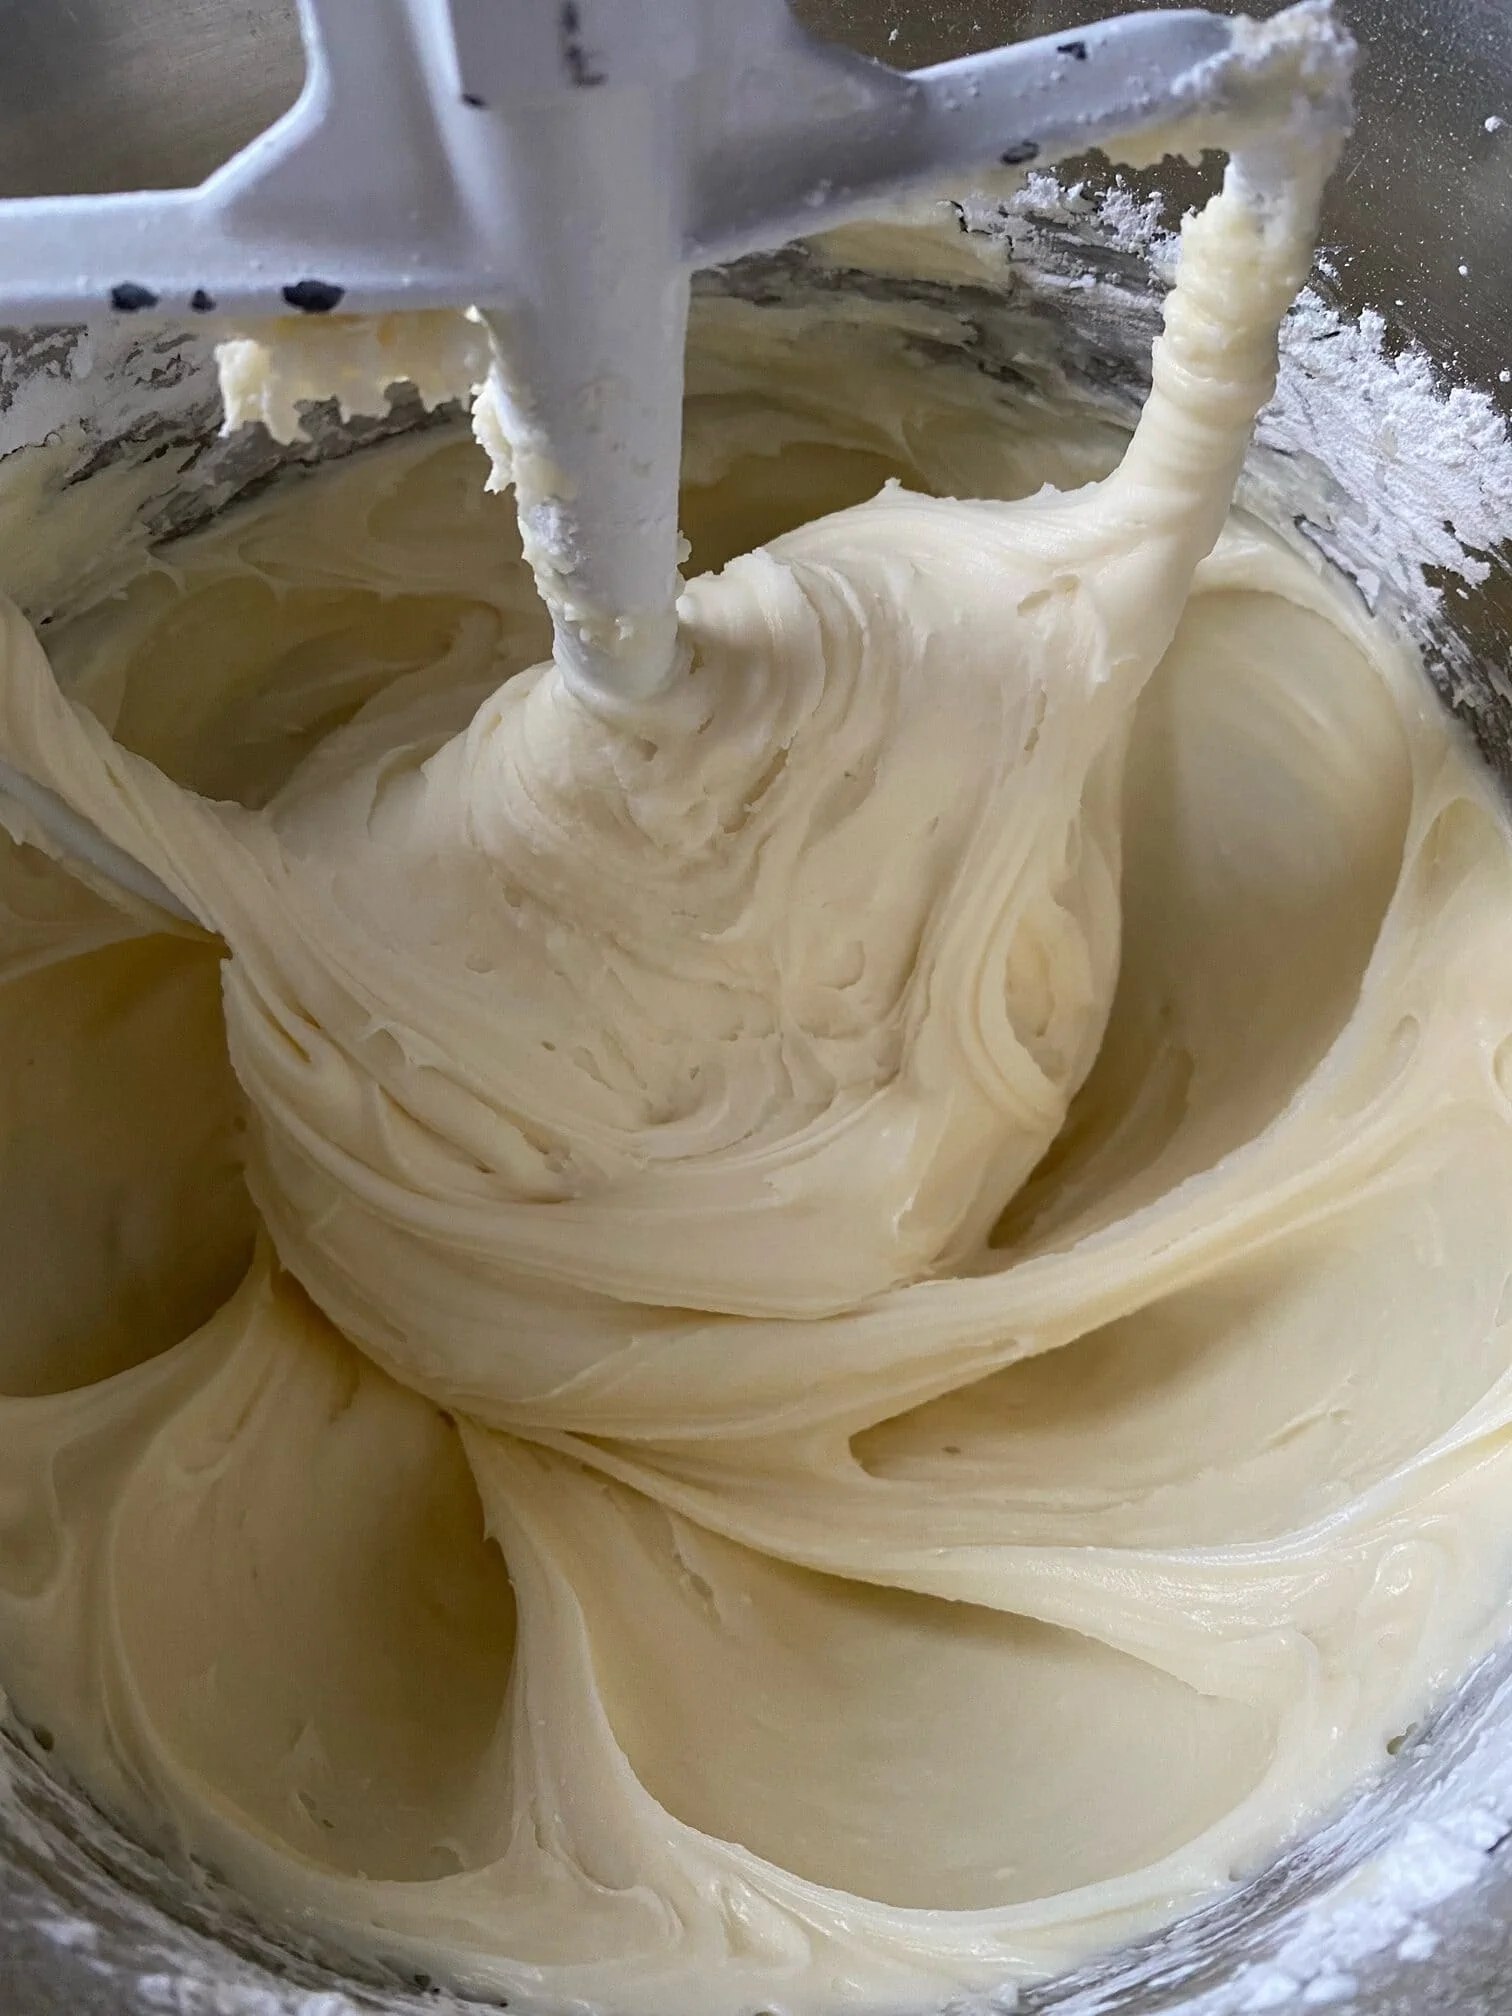
To make the frosting, add cream cheese and butter to a bowl, and mix until smooth. Add half the powdered sugar and mix until combined. Add vanilla extract and remaining powdered sugar, and beat until smooth.
Assembling the cake cheesecake
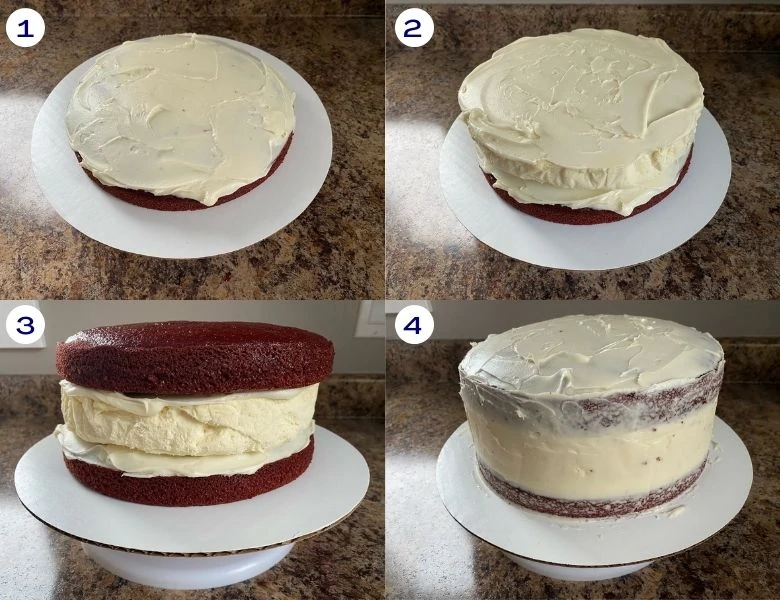
Place a spoonful of frosting onto the cake plate. This will help keep the cake from shifting while you decorate. Use a serrated knife to cut the domes off the cakes. Place one cake layer on the cake, then cover the top with about 1 cup of frosting.
Take the cheesecake out of the pan by lifting the aluminum foil. Remove the foil and place it on top of the cake. Spread another 1 cup of frosting on top of the cheesecake, and add the last cake layer. Frost the outside of the cake, and decorate the top.
For more step by step pictures, see my web story for this red velvet cake cheesecake!
✔️Expert tips
- If you don't have buttermilk, you can make your own. In a measuring cup, add 1 tablespoon of lemon juice or white vinegar. Fill the measuring cup to the 1 cup line with milk, and stir.
- Bake the cheesecake in a water bath to prevent cracks. it's an extra step, but so worth it!
- Break up baking this cake in two days. Make the cheesecake the day before.
💭FAQs
It's red velvet cake and a cheesecake layer. They all get stacked together and covered with cream cheese frosting. It's an amazing cake that will wow your guests!
Yes, you can make the cheesecake layer a day in advance. Store it in the refrigerator, covered. The cake layers can be made a day in advance too. Wrap the layers with plastic wrap and leave out at room temperature. Cake layers can also be frozen up to 3 months.
Individual cake layers can be frozen before assembling. The whole frosted cake can be frozen too. Wrap with a layer of plastic wrap, and then a layer of aluminum foil. Store in the freezer for up to 3 months. Thaw in the refrigerator overnight.

📖Related recipes
📋 Recipe
Want to Save This Recipe?
Enter your email & I'll send it to your inbox. Plus, get great new recipes from me every week!
By submitting this form, you consent to receive emails from Nina Kneads to Bake.

Red Velvet Cake Cheesecake
Equipment
- 3 9 inch cake pans
Ingredients
Cheesecake layer
- 24 oz cream cheese room temperature
- ⅔ cup granulated sugar
- 3 tablespoons all purpose flour
- 1 cup sour cream room temperature
- 1 teaspoon vanilla extract
- 4 large eggs room temperature
Red velvet cake
- 2 ½ cups all purpose flour
- 1 ½ cups granulated sugar
- 1 ¼ teaspoons baking soda
- ½ teaspoon baking powder
- 2 tablespoons cocoa powder
- 1 teaspoon salt
- 1 cup buttermilk room temperature
- ½ cup vegetable oil
- 1 ½ teaspoons vanilla extract
- 2 large eggs room temperature
- 2 teaspoons white vinegar
- 2 teaspoons red gel food colouring
- 1 cup water room temperature
Cream cheese frosting
- 16 oz cream cheese room temperature
- ½ cup unsalted butter room temperature
- 6 cups powdered sugar
- 1 ½ teaspooons vanilla extract
Instructions
Cheesecake layer
- Preheat oven to 300°F (148°C). Line a 9 inch cake pan with aluminum foil. Place cake pan into a larger cake can or casserole dish. Fill the outside cake pan or casserole dish with room temperature water, to go half way up the outside of the 9 inch pan.
- Mix cream cheese, sugar and flour together until combined. Add sour cream and vanilla extract and mix to combine, scraping down the sides of the bowl when needed.
- Add eggs, one at a time, and mix until combined after each one. Pour cheesecake in the prepared pan. Bake for 1 hour. Do not open the oven door at any time because the cheesecake could crack.
- Turn off the oven and leave the cheesecake in the oven for 30 minutes. Crack open the door of the oven and leave the cheesecake in for another 30 minutes. This slow cooling process prevents cracks.
- Place the cheesecake on a wire rack and let it cool in it's pan, until room temperature. Cover the top of the pan with plastic wrap and store the cheesecake, in it's pan, in the refrigerator until firm, 6 hours or overnight.
Red velvet cakes
- Preheat oven to 350°F (176°C). Grease and line two 9 inch cake pans on the bottom with parchment paper.
- In a medium bowl, combine four, sugar, baking soda, baking powder, cocoa powder and salt. Whisk to combine and then set the bowl aside.
- In a large bowl, combine buttermilk, oil, vanilla, eggs, vinegar and food colouring. Mix it together, and then stir in dry ingredients until combined.
- Stir in water until combined, Pour the batter evenly between the prepared pans. Bake for 22-25 minutes, or until a toothpick comes out clean.
Cream cheese frosting
- Add cream cheese and butter to a bowl, and mix until smooth. Add half the powdered sugar and mix until combined.
- Add vanilla extract and remaining powdered sugar, and beat until smooth.
Assembling the cake
- Place a spoonful of frosting onto the cake plate. This will help keep the cake from shifting while you decorate. Use a serrated knife to cut the domes off the cakes. Place one cake layer on the cake, then cover the top with about 1 cup of frosting.
- Take the cheesecake out of the pan by lifting the aluminum foil. Remove the foil and place it on top of the cake. Spread another 1 cup of frosting on top of the cheesecake, and add the last cake layer. Frost the outside of the cake, and decorate the top.
- Store the cheesecake for 1 hour, covered, at room temperature. If you need to store it longer, store in the refrigerator covered for up to 3 days.
Notes
- If you don't have buttermilk, you can make your own. In a measuring cup, add 1 tablespoon of lemon juice or white vinegar. Fill the measuring cup to the 1 cup line with milk, and stir.
- Bake the cheesecake in a water bath to prevent cracks. it's an extra step, but so worth it!
- Break up baking this cake in two days. Make the cheesecake the day before.


Comments
No Comments